After extreme weight loss, some men develop excess skin on the upper chest, sides and back. Dr Bernard Beldholm’s upper thoracic lift combines a chest lift with an upper back lift to tighten the skin surgically.
This article explains how Doctor Bernard performs the surgery in detail. In addition to removing the extra skin, he can also perform VASER liposuction to reduce chest and back fat in men.
Many of your upper thoracic lift questions will be answered in this article. You will learn how the operation works, benefits and risks, who is a good candidate and what kind of results to expect.
What is an upper thoracic lift?
Doctor Bernard’s upper thoracic lift for men includes excess skin removal on the chest and back. It is most commonly performed on men who have lost a significant amount of weight. The procedure involves trimming off the extra skin and may also include VASER liposuction to reduce back fat and chest fat.
What are the benefits of an upper thoracic lift?
An upper thoracic lift helps male post-weight loss patients achieve the following:
- A masculine chest
- Less fat and loose skin on the upper back and sides
- Less discomfort and irritation from loose skin
- Increased mobility during exercise
- **
- Better-fitting shirts
Who is a good candidate for the surgery?
If you are concerned about lax skin on your upper chest and back after weight loss, the upper thoracic lift might be right for you. Doctor Bernard will listen to your concerns and then perform a physical examination to determine the best mode of treatment. If you only have excess skin/fat on your chest, you may be a better candidate for gynaecomastia surgery or a male chest lift with Doctor Bernard.
The ideal candidate for surgery is **, has reached their weight loss goal, maintains a stable weight long term, has realistic goals and does not smoke. If you smoke, you will need to quit at least four weeks before and after surgery. Smoking greatly increases your risk of minor and serious complications.
If you have pre-existing health conditions, you may need to undergo medical testing to clear you for surgery.
What are some factors to consider before choosing to have surgery?
Before deciding to have an upper thoracic lift, you should consider the following:
The surgery leaves a scar
The tradeoff for an ** physique with body contouring surgery is the surgical scar. A chest and upper thoracic lift leaves a long scar that follows what may be called the bra line. The scar takes a year or two to fade. However, it never fully disappears. If you have body hair, it may help to hide the scar to an extent. The scar is not visible in most styles of clothing.
All surgery comes with a degree of risk
Before having the surgery, it is important to know of the risks. While the procedure is ** for most ** patients, risks may include infection, sutures spitting, seroma, hematoma, blood clots, pulmonary embolism, skin necrosis, wound breakdown, tissue death, skin irregularities from liposuction, permanent nerve damage, a difficult recovery, scars or unhappiness with the results. Doctor Bernard will review all the risks with you at your consultation. He will answer any questions you might have. He pre-screens all his patients to ensure they are a good candidate for surgery and do not have a heightened risk of complications.
There is downtime after surgery
Patients who have office or sedentary careers usually take two weeks off to recover. Your time off work may be longer if you have a physically demanding job. That doesn’t mean you should be lying around in bed. Doctor Bernard encourages his patients to start walking on day one and increase their activity level each week. High-impact exercise and heavy lifting are off limits for six weeks after surgery.
Operation Guide: Chest Lift and Upper Back Lift with VASER Liposuction
Learn how Dr Bernard Beldholm, FRACS performs an upper thoracic lift for a toned and flat chest and upper back after male weight loss.
Phase 1: Surgery Preparation
Pre-operative markings
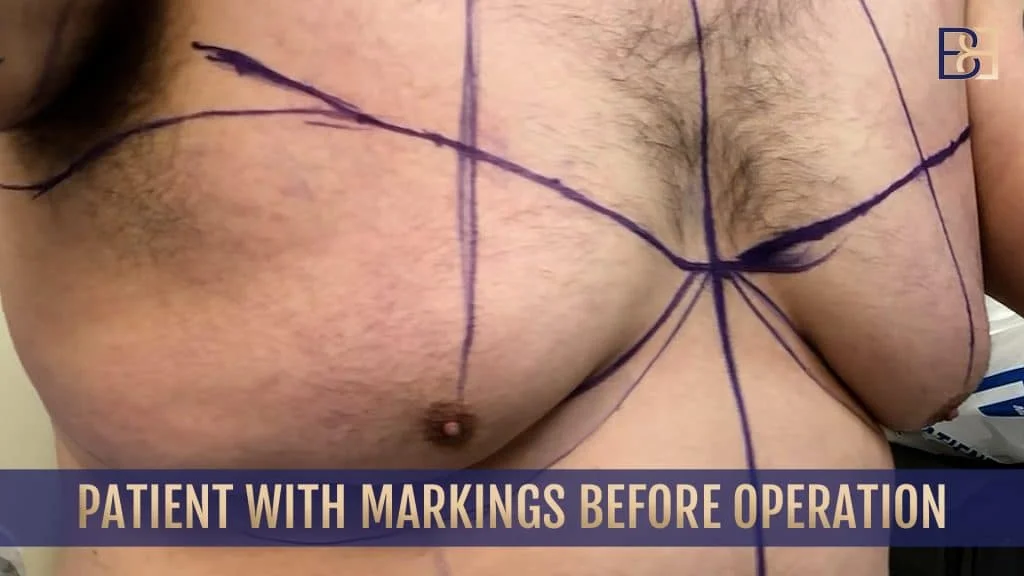
Before the operation, Doctor Bernard will meet you in the anesthetic bay at the hospital. He will go over any last-minute questions you might have. He will then draw markings on your upper chest and upper back to plan your surgery.
Positioning you on the operating table
You will lie on your back for the operation. After removing the loose skin on your chest, you will be turned on each side to ** the sides of your chest and upper back.
Anaesthesia
You will receive general anaesthesia through an IV. There will be no pain or memory of your surgery. After you are under anaesthesia, a tube will be inserted to help you breathe. Doctor Bernard’s anaesthetist will monitor your vitals while you are in surgery.
Phase 2: Upper Chest Lift
Incision and dissection
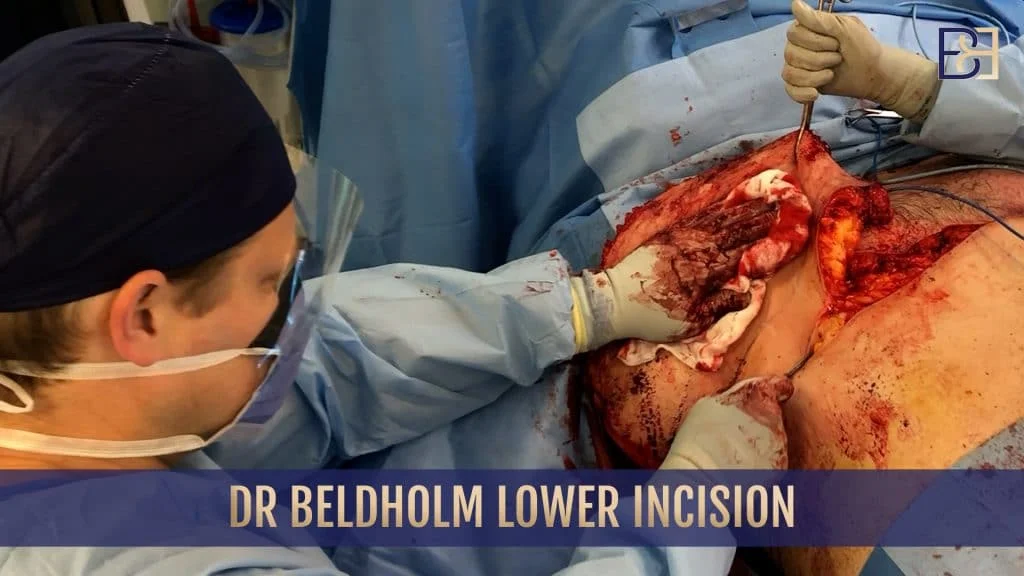
Doctor Bernard will make a horizontal incision on the pectoral surface. He will dissect the chest tissues down to the pectoralis major muscle. He will define the edges of the muscle as well as a small area on the ribs closest to the bottom of your pec major muscles.
Stitching the upper skin to the rib
He will stitch your upper chest skin flap to the rib just below your pectoralis major muscle. He will use a permanent suture for this. This helps to create a defined pectoral fold at the breast base.
De-epithelialisation
If there is a lot of excess skin on your chest, he will need to move your nipple areola complex so that it sits in a normal position after he pulls your chest skin down. He will measure the diameter of your areolas. If your areolas are larger than you would like, he can reduce the size of them at this stage.
After measuring your areolas, he will de-epithelialise the skin on the upper chest flap. This will be the site where he grafts your areolas into the final position. Doctor Bernard has observed that male patients have more lateral areolas than females. He will keep this in mind when determining the ideal position for your nipple areolar complex.
Grafting the nipple areola complex
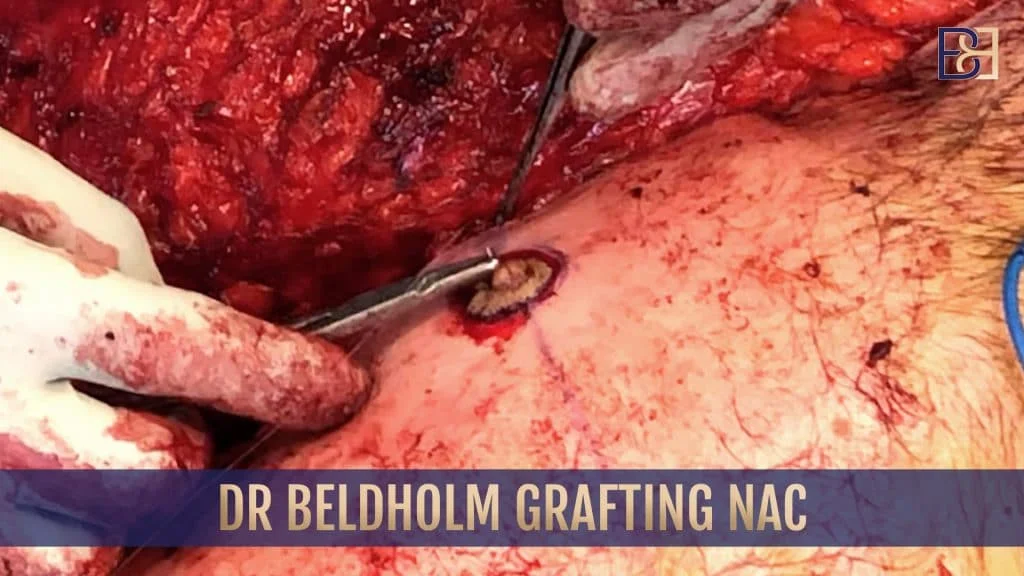
Now that he has determined where to move your areolas, he will detach your nipple areola complex. He does this as later in the surgery as possible to preserve blood flow. He will make the nipple areola graft as thin as possible. A thick graft has a hard time establishing the new blood supply.
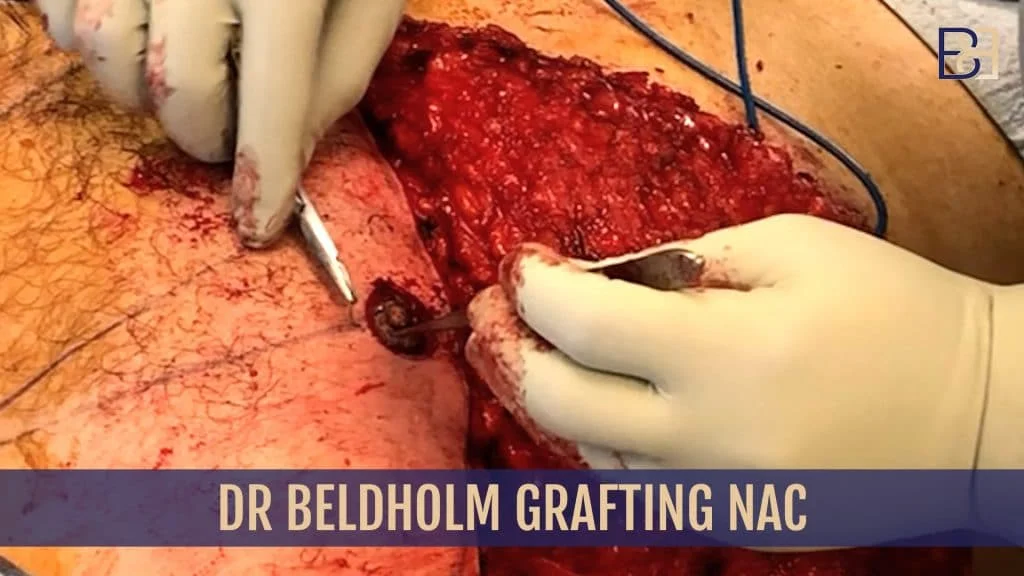
He will then move the nipple areolar complex to the de-epithelialised site. He will use fine absorbable sutures to secure it in place. Thick sutures can result in scarring. Doctor Bernard will then place a small foam sponge on the graft. He will use surgical clips to secure it in place. This helps to pressurise the graft so that the blood supply takes to it. The foam sponge and clips will be removed seven to ten days after your surgery. The grating process is repeated on both areolas.
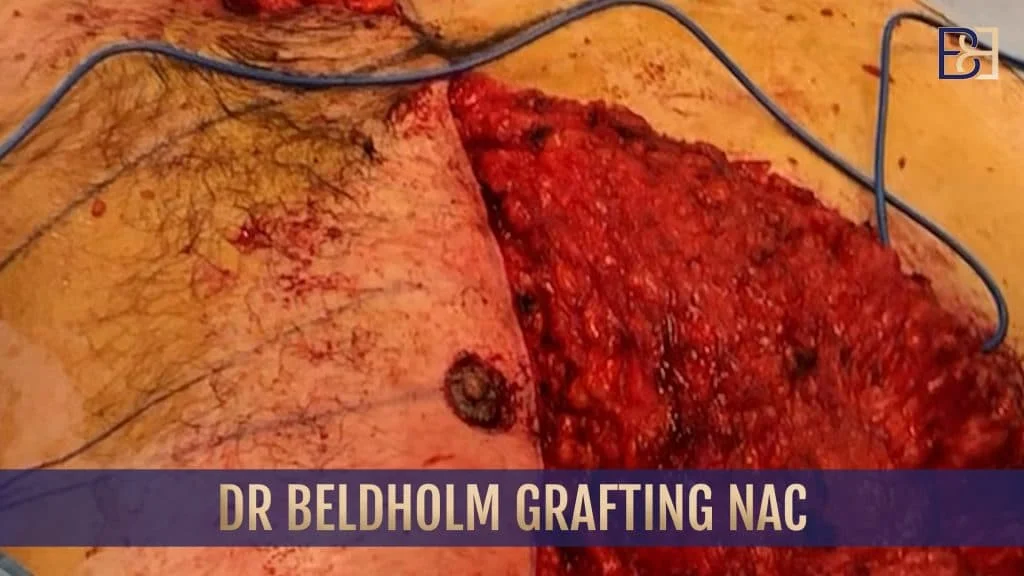
Excess chest skin removal
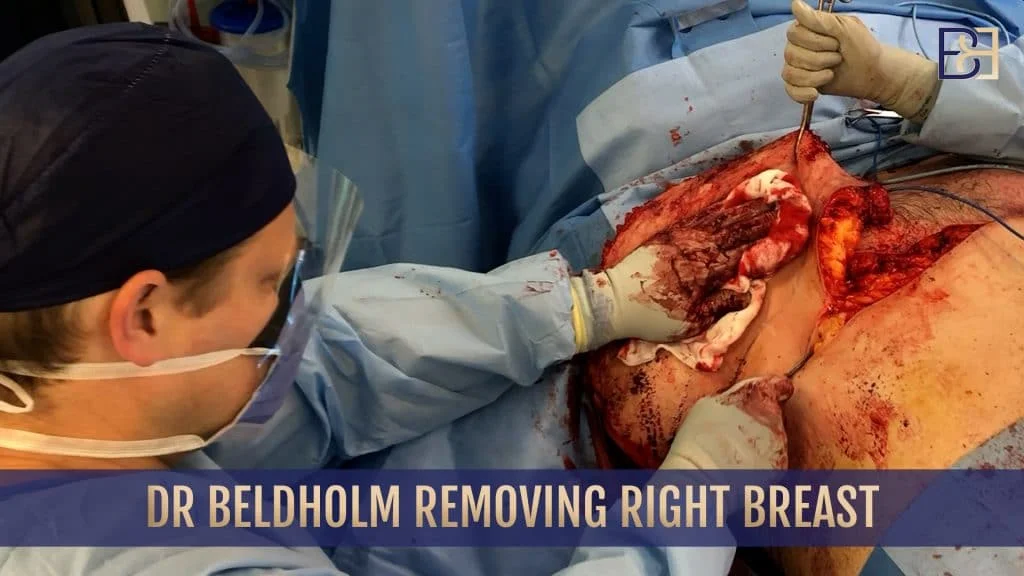
Now it is time to remove the loose skin on your chest. Working in small sections, Doctor Bernard will resect the excess skin. He will temporarily close the skin flap to make sure he removes the ideal amount of skin. The goal is a tight result without being so tight he can’t close the incision.
Closure
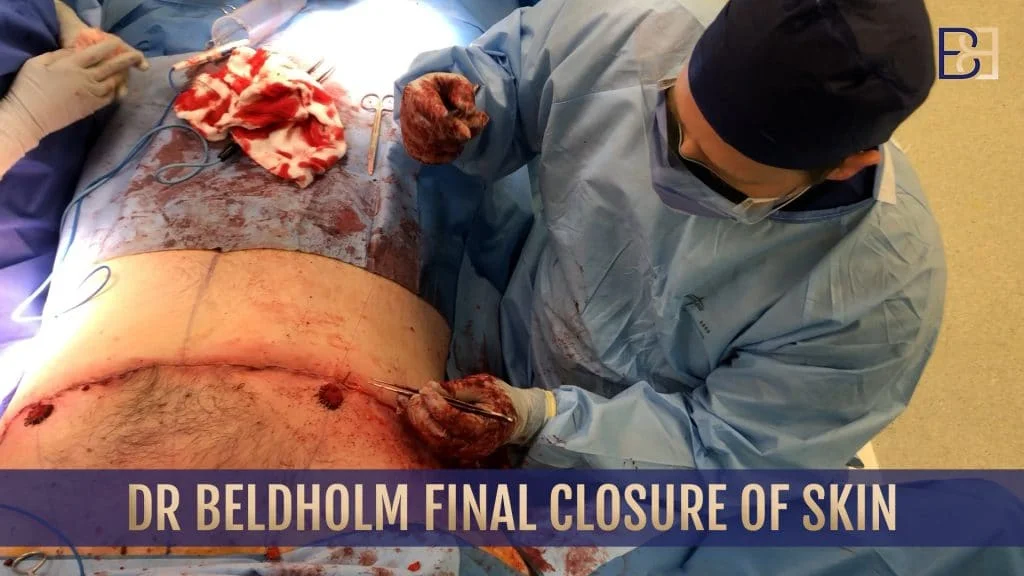
After he removes your excess chest skin, he will close the incision. At this stage, your chest should appear firm, flat, and taut. An added benefit is that as he closes the chest incision, it helps to lift the upper abdominal skin to an extent. This is another area patients often have loose skin after weight loss.
Phase 3: VASER Liposuction
Next, he will ** the loose skin on the side of your chest and upper back. To get the most defined result, he may perform VASER liposuction. VASER melts fat and then removes it with a suction cannula. Many surgeons today consider VASER better than standard liposuction.
Turning you on the operating table
You will be turned on your left side.
VASER liposuction process
He will perform VASER liposuction on the left side of your chest and upper back to reduce fat and partially dissect the tissues prior to skin removal. VASER is a multi-step process:
Wetting solution
He will apply a wetting solution to the tissues with a pump and cannula.
Skin protection
The VASER probe gets hot. To protect your skin from heat burns, he will place small protective ports in your skin before inserting the probe into the fat layer.
Fat melting
VASER is a fat melting technology that uses ultrasound energy to create bubbles in the wetting solution. This helps to dislodge and melt the fat cells until they are the consistency of hot butter. He will insert the probe in your skin and into the fat layer to start melting the fat.
Fat removal
Once your back fat is melted, he will remove the fat with a cannula hooked up to a suction device. Because the fat is liquid instead of solid, low-power suction is all that is needed to remove it. Because of this, VASER is ** on the tissues than standard liposuction.
Phase 4: Upper Back (Thoracic) Lift
Incision and dissection
He will continue the incision around the sides of your chest toward your upper back in what is known as the ‘bra line’. He will dissect the tissues to free the skin flap.
Back skin removal
Doctor Bernard will trim off the excess skin from your upper back and sides.
Closure
He will close the incision with sutures, leaving the skin on your upper back and sides smooth, tight, and firm.
Repeats all steps on the other side
You will be turned onto your right side. He will repeat the process to remove the fat and loose skin from your right upper back and sides of your chest.
Phase 5: Finalising Your Surgery
Drains
After surgery, fluid may build up in the tissues. This is considered a normal response to surgery. Doctor Bernard will insert drains to both sides to drain the fluid. He will remove the drains a day or two after your surgery at a follow-up visit.
Wound dressings
To keep the wound clean, he will apply a soft dressing to cover the incisions.
Compression garments
You will wake up in the recovery room at the hospital wearing a compression garment. The garment is made of stretchy material that applies ** pressure. Compression is thought to minimise swelling and help your skin retract to your new body shape. You may be asked to wear the garment for six weeks on average.
Results
Many patients want to know how much skin and fat they lost during the surgery. Doctor Bernard weighs the tissues so you will know exactly how many kilogrammes of weight you have lost in excess skin and fat as a result of your upper thoracic lift.
Disclaimer
Individual results may vary. Seek a second opinion. All surgery has risks.

